Servicedesk Plus - Adding Widgets to Users' Homepages to Easily Access Their Requests
A special widget can be added to the Homepage to solve the problems that users may experience while accessing their current requests and to access the request content in a more practical way.
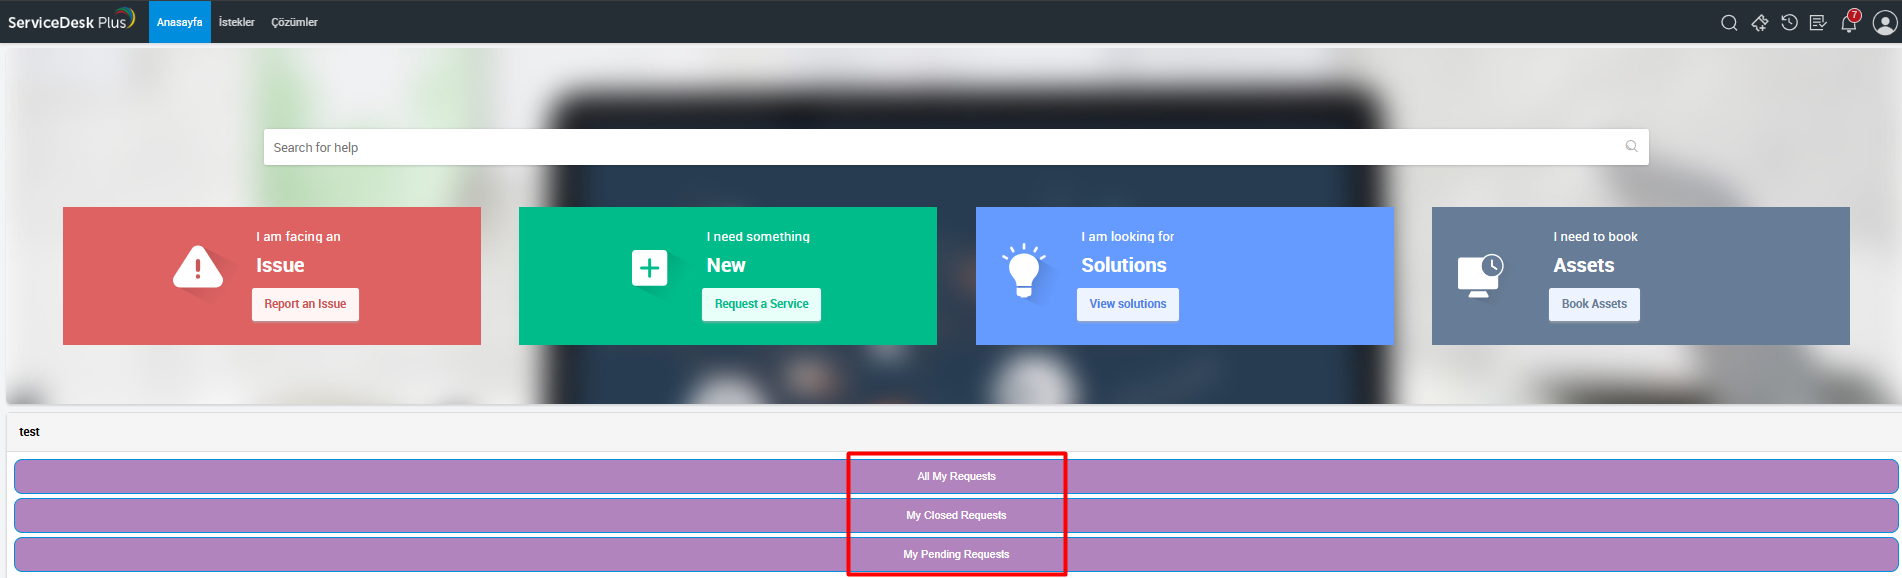
With this Widget to be added to the homepage, the user can access their requests through default filters by clicking on the All My Requests , My Closed Requests and My Pending Requests buttons.
If you want the button content to be in Turkish, information has been provided under the Application Steps so that you can make changes. (Step 6)
You can check the screenshot below for the situation that will occur after the application steps.
Application Steps:
1- Log in to the Servicedesk Portal as Admin.
2- Go to the Home page on the portal and continue by clicking on the Customize>Requester Home Page option on the right.
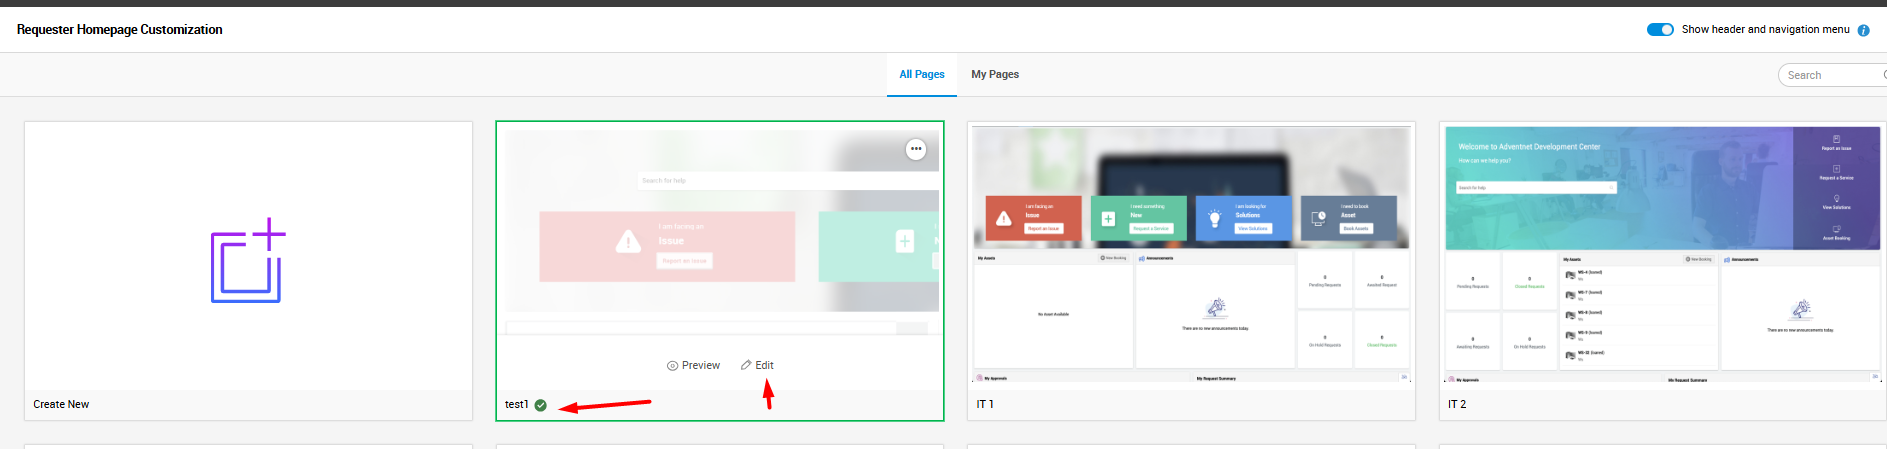
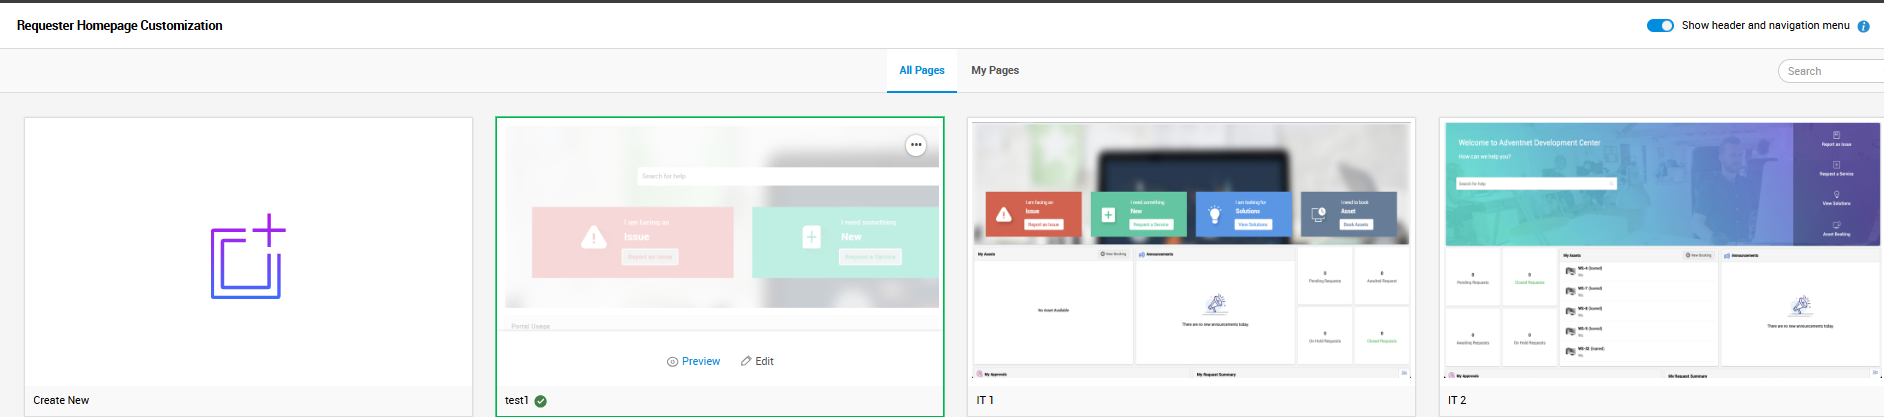
3- In the opened Request Homepage Customization page, the currently used user homepage needs to be determined. As in the screenshot below, the tick (green) sign is the currently used user homepage. Please continue by Editing this Homepage.
4- On the page that opens, click on the Widgets option on the left side and then continue with the + at the bottom.
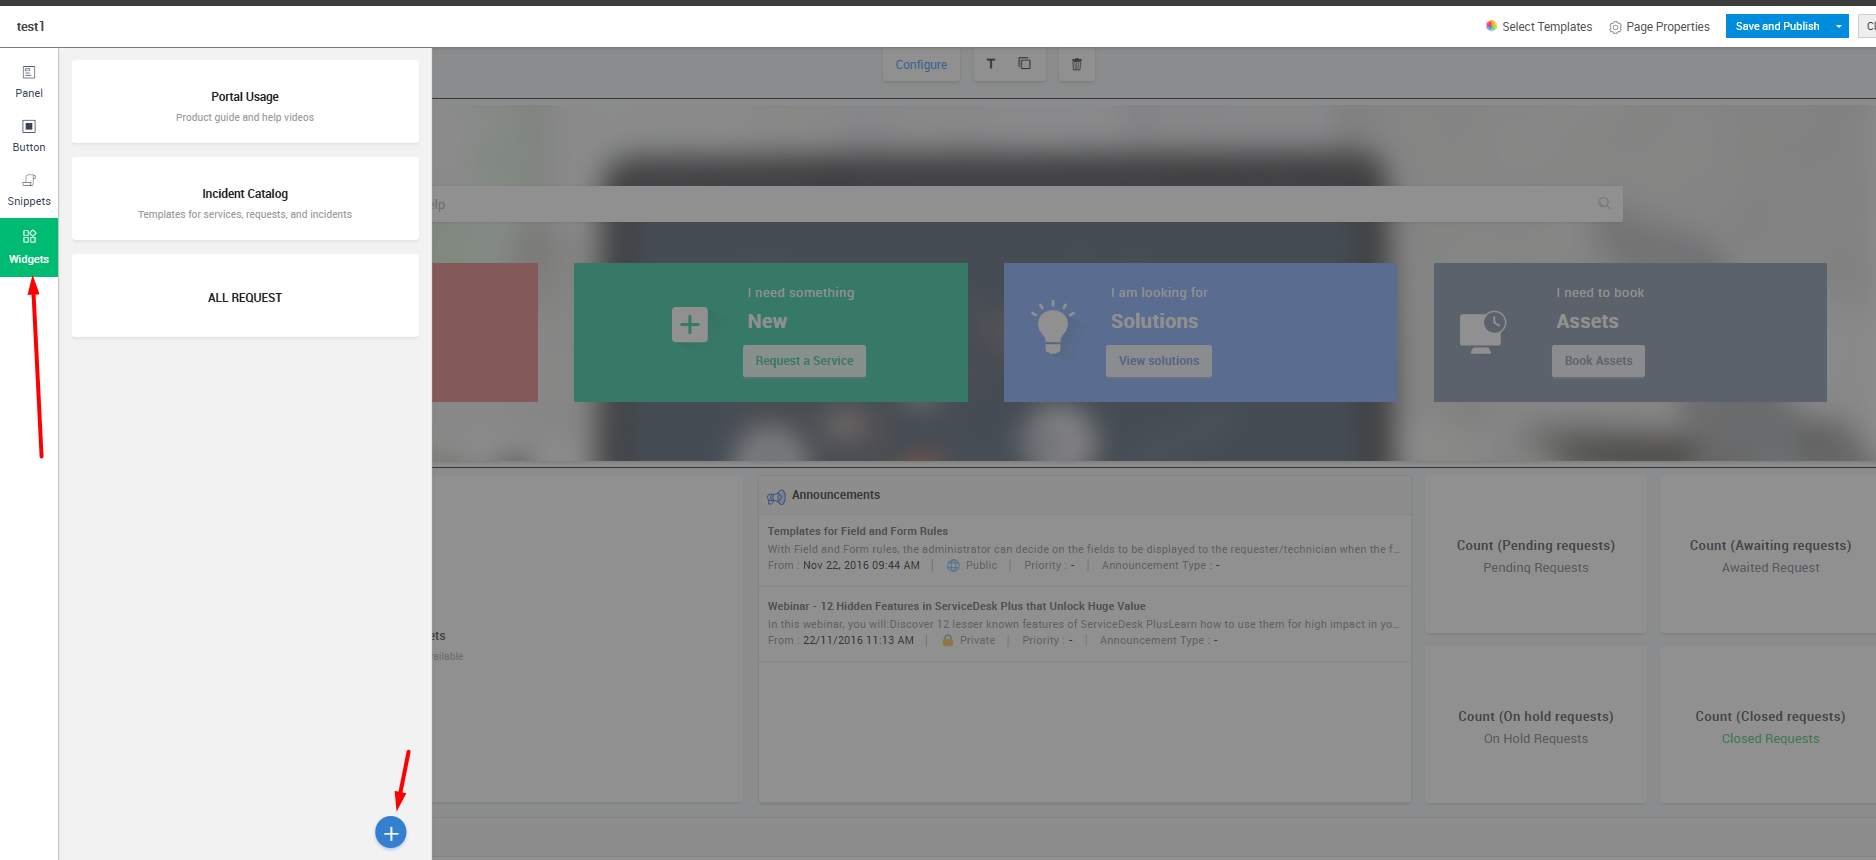
5- In order to apply the URL redirection and HTML buttons that we have specially configured in this section, the attached file must be downloaded and converted to HTML format (if the .txt file is downloaded).
5.1- Widget Name is given a name that is suitable for users to see.
5.2- Click on browse at the bottom and select the html file or .txt file (edited as html) in the attachment and click on add.

6- In order to use the Widget we added after the above operations on the Homepage, you need to open the Widget area again and click and drag the newly created Widget and place it in an area you find appropriate on the Homepage area.
Note: If you want the button names to be in Turkish, you can edit the HTML content in the field I provided below.
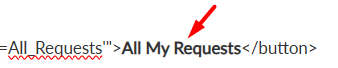
<button class="btn-widget btn-primary" type="button" onclick="parent.location.href='/WOListView.do?viewID=85&globalViewName=All_Requests'"> All My Requests </button>

7- After placing the widget in a suitable area, you can save and publish your settings by clicking Save and Publish at the top right.

8- After publishing, it is recommended to check the following 2 steps to ensure that it is published successfully on the user homepage.
8.1 - The Requester Homepage Customization page is reopened and our edited Homepage is examined by clicking Preview.
8.2- The Homepage is checked by logging into the Servicedesk portal with a non-technician user.
During the implementation of the relevant steps or in case you have a new development request, you can reach us via our contact addresses.
4- On the page that opens, click on the Widgets option on the left side and then continue with the + at the bottom.
5- In order to apply the URL redirection and HTML buttons that we have specially configured in this section, the attached file must be downloaded and converted to HTML format (if the .txt file is downloaded).
5.1- Widget Name is given a name that is suitable for users to see.
5.2- Click on browse at the bottom and select the html file or .txt file (edited as html) in the attachment and click on add.
6- In order to use the Widget we added after the above operations on the Homepage, you need to open the Widget area again and click and drag the newly created Widget and place it in an area you find appropriate on the Homepage area.
Note: If you want the button names to be in Turkish, you can edit the HTML content in the field I provided below.
<button class="btn-widget btn-primary" type="button" onclick="parent.location.href='/WOListView.do?viewID=85&globalViewName=All_Requests'"> All My Requests </button>
7- After placing the widget in a suitable area, you can save and publish your settings by clicking Save and Publish at the top right.
8- After publishing, it is recommended to check the following 2 steps to ensure that it is published successfully on the user homepage.
8.1 - The Requester Homepage Customization page is reopened and our edited Homepage is examined by clicking Preview.
8.2- The Homepage is checked by logging into the Servicedesk portal with a non-technician user.
During the implementation of the relevant steps or in case you have a new development request, you can reach us via our contact addresses.
Related Articles
ServiceDesk Plus – Configure Technician to See Only Requests on Their Site
Scenario Let's say you have a branch or department in a different location or country. In such a scenario, you may want to integrate this branch or department into your existing Servicedesk Plus structure. However, you will need to create a separate ...SDP & Jira Integration Document: Technical Installation Guide
SDP → Jira Cloud Integration Setup Guide Contents ? Overview 1. Overview & Architecture 2. Network / Firewall 3. Jira Preparation 3.1 API Token 3.2 Base64 String 3.3 Finding Field ID 3.4 Postman Test 4. Callback Function 4.1 Creation 4.2 Deluge ...Barcode-Based Asset Management with ServiceDesk Plus & AssetExplorer
Barcode-Based Asset Management with ServiceDesk Plus & AssetExplorer The barcode management feature included in ManageEngine ServiceDesk Plus and ManageEngine AssetExplorer enables fast, accurate, and traceable asset management. With this structure: ...ServiceDesk Plus - Creating User List Additional Field in Request Form
When opening or editing a request, there may be times when we need to enter user information (name/surname) in addition to requester and technician information. Such situations may cause us to write incomplete or incorrect name and surname ...ADManager Plus – Bulk Modification/Adding of Secondary Email Addresses
? Purpose Changing the secondary email addresses (proxy addresses) of a large number of users in bulk. ? Steps (Exchange Tasks - Modify SMTP Address) Click the Management tab. Under User Management → Exchange Tasks, select Modify SMTP Address. ...